

How To Put Legs On Ashley Sectional
Is your furniture too short? Adding legs to a dresser not only adds height, it gives a mod touch to your onetime furniture. Learn how to Easily add legs to dressers, my favorite place to go legs for a dresser, and how to quickly modify your dresser so you can put those legs on.
Get more than piece of furniture makeover ideas here!
This definitely isn't our first rodeo of calculation legs to a dresser. Actually, over the years, we have added legs (or piece of furniture anxiety) to quite a few different pieces of piece of furniture.
And over the years we have used and then many different techniques. If yous go wayyyy back to the get-go, I wrote a tutorial on how to add together legs to nightstands, merely information technology definitely was not the easy manner.
We spent hours trying to measure everything but right, nosotros used sometime legs from another furniture, and nosotros really didn't have many tools. We were just getting started.
So we got a little smarter, and learned a dissimilar method of adding legs to furniture. This way is so much easier, but you still have to mensurate a lot and buy extra woods.
*Update* – Since this makeover, I have also written a post near how we cut a desk in one-half to create two nightstands and and then added legs to the nightstands because two legs were missing.
This was a actually fun makeover that pushed me further into building and repurposing article of furniture!
The Piece of cake Fashion of Adding Legs to a Dresser
And so we heard of using a multi-functional tool to cut wood furniture in one-half to make information technology into something else. I'yard sold!
I mean, how absurd is this makeover?? And she used a multi-functional tool to cut upward an one-time Telly stand and created ii different things.
And then I looked into this tool and found out there are so many things that a homeowner / DIYER can practise with a multi-functional tool!
Using a Multi-Functional Tool
After searching effectually for a great multi-functional tool, I landed on this specific one. The Dremel Multi-max.
Why?
Well, Dremel is a great brand. They have years behind them, and the reviews were corking!
I also really liked how easy it is to change the accessories with the Quick Lock.
No one else had this super like shooting fish in a barrel feature! Then instead of quick and easy, I would have to use a hex primal to change out the accessories. No give thanks y'all. I desire it to be super unproblematic and easy so I'll actually desire to use information technology!
I also really liked how many accessories came with information technology; 4 cutting blades
- forest
- metal and forest
- woods and drywall
- drywall jab saw
- a grout removal blade AND a sanding pad with 21 sheets of sandpaper that velcro onto the pad.
And then basically it'southward a sander and wood, metal, drywall and grout cutting motorcar, all in 1.
Oh and it comes with a little bag to put everything in too which my OCD married man loves.
I reached out to Dremel and they sent ane over for this project!
Here's the consummate truth, before nosotros even were able to become effectually to this dresser, we used this Dremel twice. And since this project we have used information technology countless times.
From using it as a sander to go into corners and tight spaces, to cutting random wood for random projects around the business firm.
I've been blown away past how many times I have used it in only a month or two.
Every bit an Amazon Associate, I earn from qualifying purchases. I also may earn from other qualifying purchases with other companies or become free production to review and employ. All opinions are my own.
To Add Legs to Furniture, You lot'll Need:
- Dremel Multi – Max
- Eye Protection
- Legs or Feet
- Furniture Leg Plates
- Drill with a Small Drill Fleck (smaller than the screws that come with the leg plates)
- Paint if you lot decide to paint your article of furniture too!
If yous're a visual learner, check out this quick video of the whole process to add legs to this dresser.
Getting Rid of the Old "Legs"
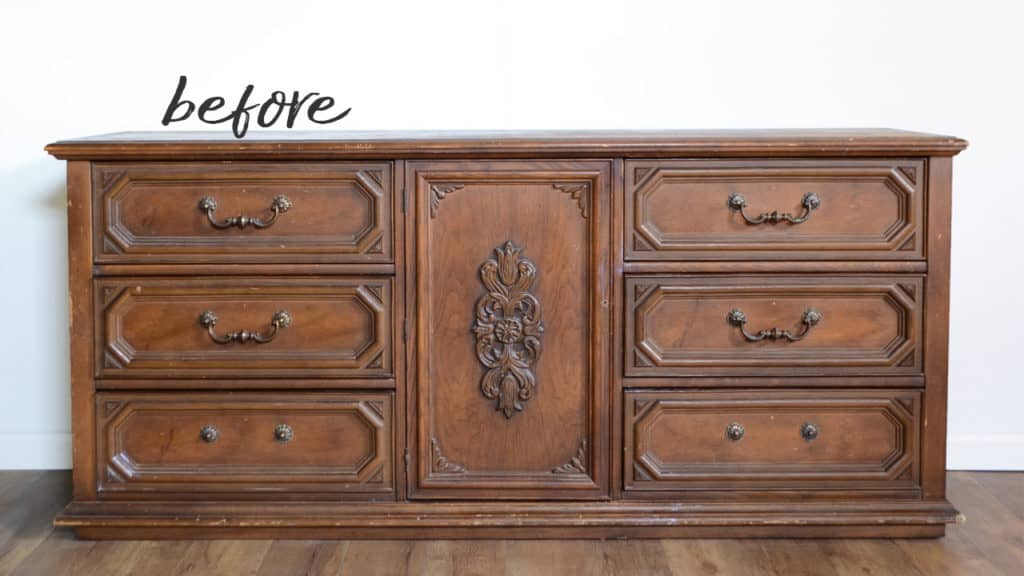
If you notice, this dresser has a skirt on the lesser that acts as it's legs to make the dresser taller.
The skirt really out dates the piece though, so the first stride is to go rid of it.
At present, I thought I might take a jigsaw or round saw to it, merely I've done that in the by, and it really isn't every bit easy every bit it sounds. Neither of those saws really cut straight, and y'all can't just rely on keeping information technology flush confronting the other forest because they are so strong that they will cutting through what you're trying to keep it flush up against.
That's why we got this Multi-Functional Tool!
Another reason nosotros wanted to have the skirting / lesser off, is and then we would have a practiced identify to screw the leg plates into.
In the past we've added plywood over the skirt to make a box, but that takes extra material which means more than money and time. And information technology just doesn't expect as clean cut!
Get the Secrets!
Grab this super user-friendly Ebook with all of our secrets on how to repair furniture for only $5. You tin can impress it out and have instant access whenever you come across damaged furniture, and know exactly how to fix it!
Click on the movie of the book to purchase!

Look to see if any screws are holding the lesser on.
We started out past flipping over the dresser, and then it was sitting on information technology'south top.
Then we took a closer look at what we would need to do to take off the skirt. On this particular dresser, and on a lot of dressers, the front skirt was screwed on, but the side skirts were actually role of the sides of the dresser.
So we removed the screws from the forepart skirt, and removed the screws from any of the wood braces that we saw. These are ordinarily in the corners of the skirts, and maybe in the middle back of the dresser.
In one case all the screws were removed, the front brim easily came right off. At that place were two braces in the back that were nailed on besides, and so nosotros used a hammer to pound those off.
How to Easily Cut Off the Bottom of a Dresser
Now we just needed to go rid of the side skirts.
Here'south where the Dremel made it's debut!
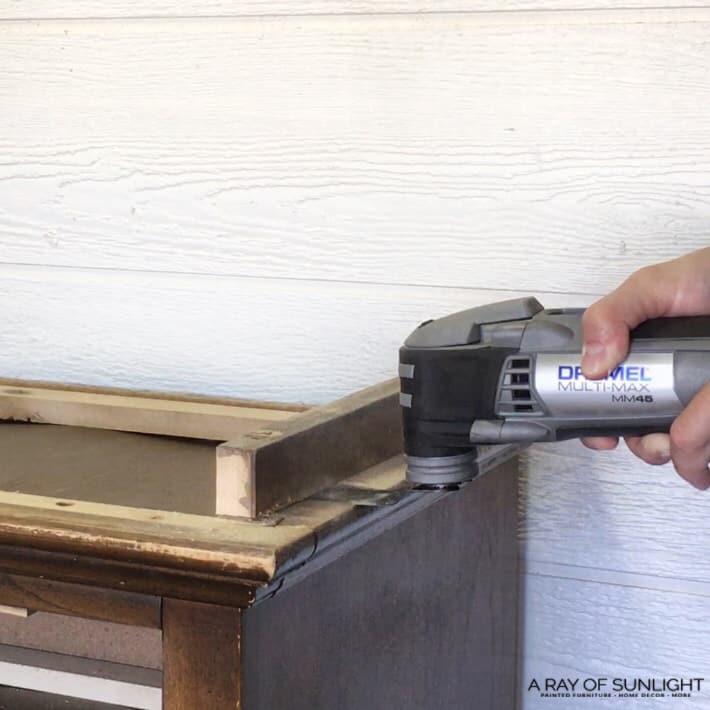
Nosotros put on a forest blade, locked it in identify, turned the Dremel on, and then cut the sides downwards flush with the other wood.
Basically nosotros just put the blade down on the base of operations of the dresser and then pushed the wood bract into the brim.
The blade made a perfect cut, flush with the base of the dresser.
Nosotros pushed through the forest, and then brought the saw back a bit and repeated the process until the skirt was cut off.
It was sooo like shooting fish in a barrel and quick! In less than x minutes I got rid of the ugly skirt and was almost prepare to put on the legs.
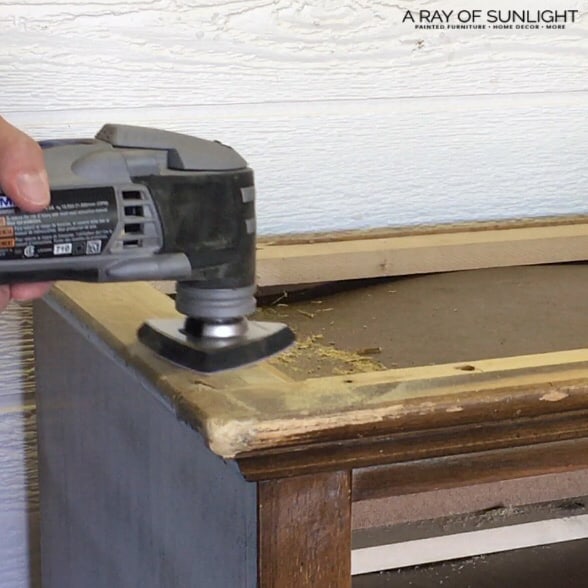
Just considering I could, I went dorsum with the sanding zipper, and sanded my cut down even more than smooth and flush.
How to Attach the Legs
Notice how the dorsum of the dresser is lower than the sides and the front still?
On this dresser, I had to add a piece of wood on each side in the back but to give me a place to put the plates.
But it was super easy!
We simply cutting a piece to fit and screwed it into the wood below. And we made sure that the screws wouldn't be in the way of the plate besides.
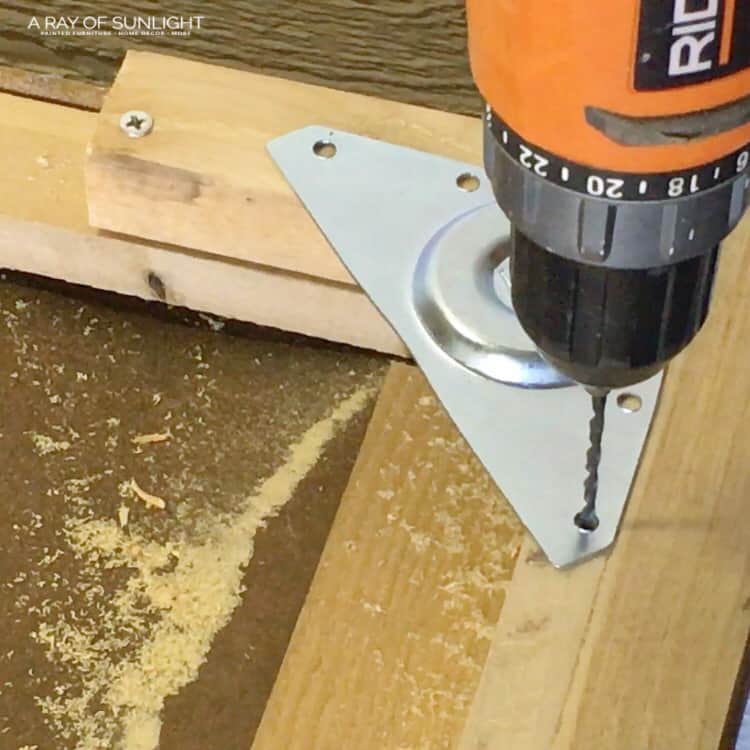
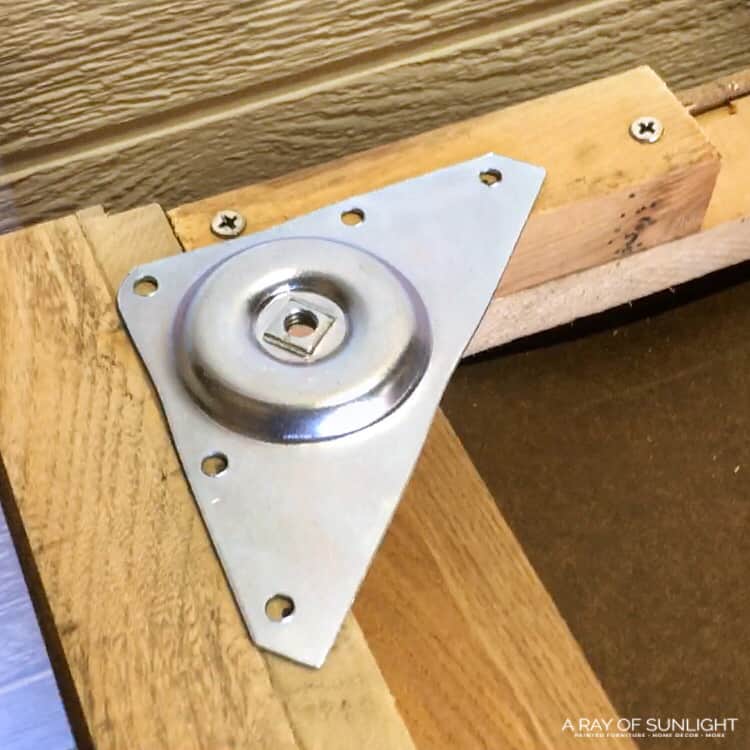
Then I grabbed the leg plates and screwed them into place.
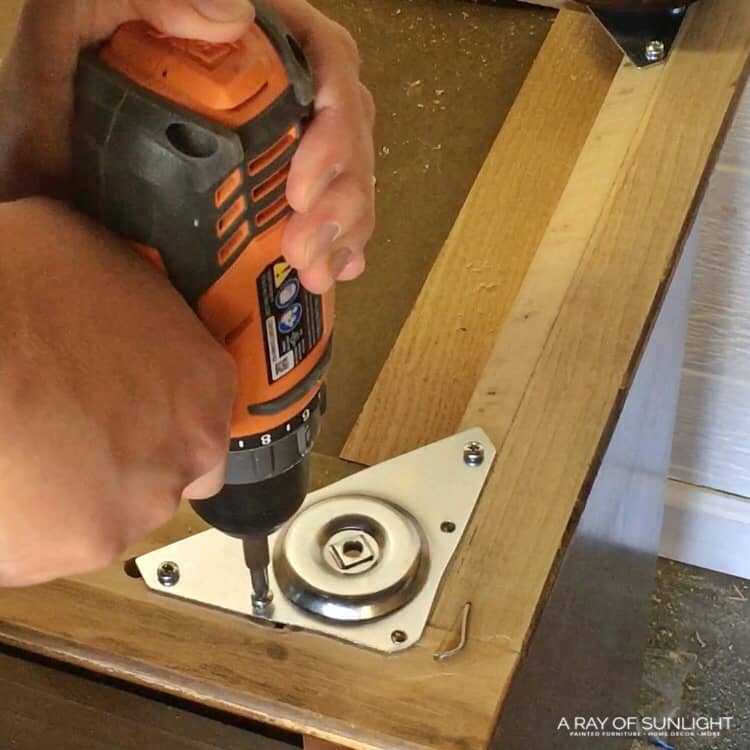
To practise this I fabricated sure the screws went into solid wood and not in a crevice between forest, then I marked where the screws needed to go with a sharpie.
Since I didn't want the wood to split, I drilled in little starter holes for the screws before I screwed in the actual screws.
And then I put the leg plates back on, and screwed them into place.
You tin also use different mounting hardware like we did on this painted cedar chest to go rid of that gap between the leg and base of the article of furniture that sometimes happens with the other methods.
Where to Buy Legs for a Dresser??
All that was left to practise was to spiral the legs into the plates.
I got these legs off of Amazon – they take such a corking selection for pretty proficient prices! Home Depot and Lowes too have a pocket-size pick of legs.
I love these legs though because they are taller and chunkier than you tin can find at other stores, and they come already stained and finished if you're wanting to add them to an already finished piece of furniture.
And if you're wanting to paint, just prep them like you practice the furniture, and so pigment! Plus if you distress your painted end, the stained finish will evidence through, exactly what y'all want!
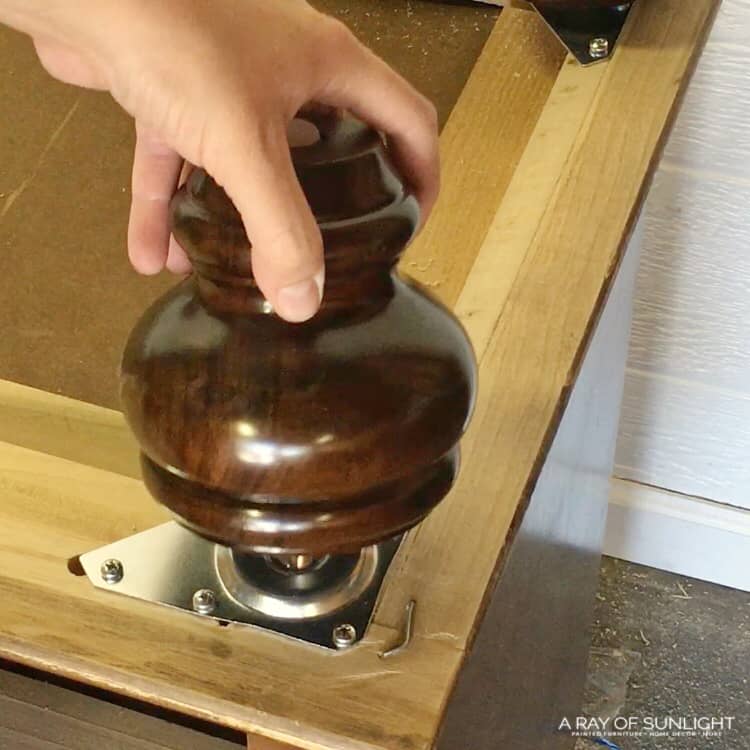
If you observe, these legs already have the screws congenital in on the top. These are the kind you demand.
Painting your Dresser
If y'all're planning on painting, I would suggest to take the legs back off the dresser before painting.
Acquire how to pigment piece of furniture with our Painting Furniture 101 post!
It's actually hard to get all the fashion around the legs when they are so low to the ground, then I stuck the screw of the legs upside down into a piece of styrofoam.
I had foam insulation sitting around and information technology was perfect for this! You could also cut some holes into a cardboard box to screw the legs into.
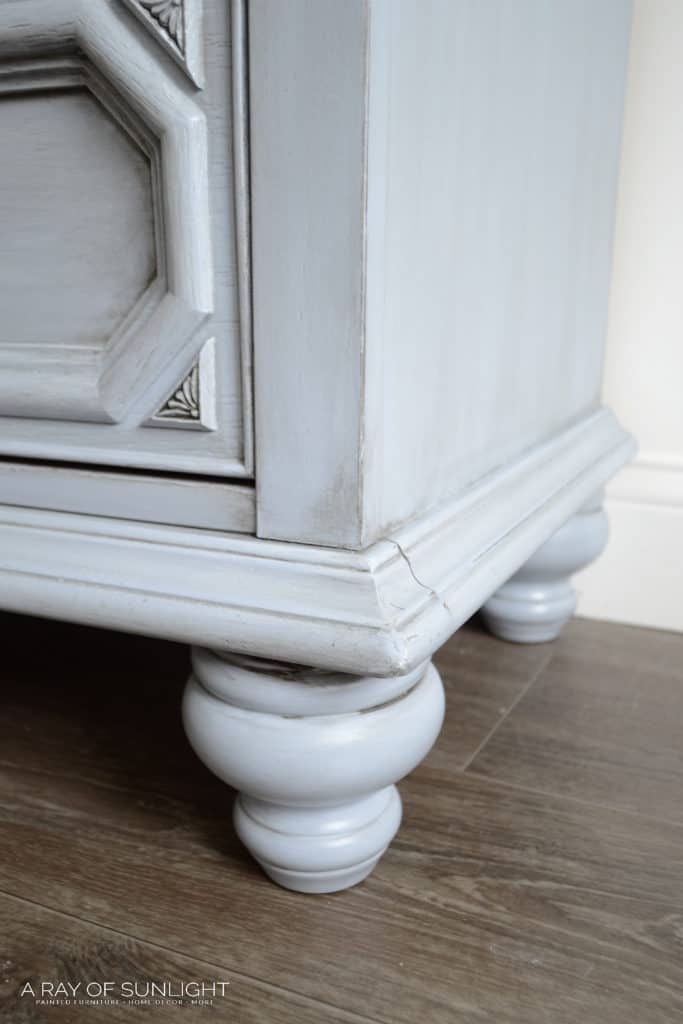
To finish off this makeover, we painted the base of operations of the dresser in a custom mixed light blue, then glazed the details. The peak was completely stripped and stained. And the drawers got new hardware!

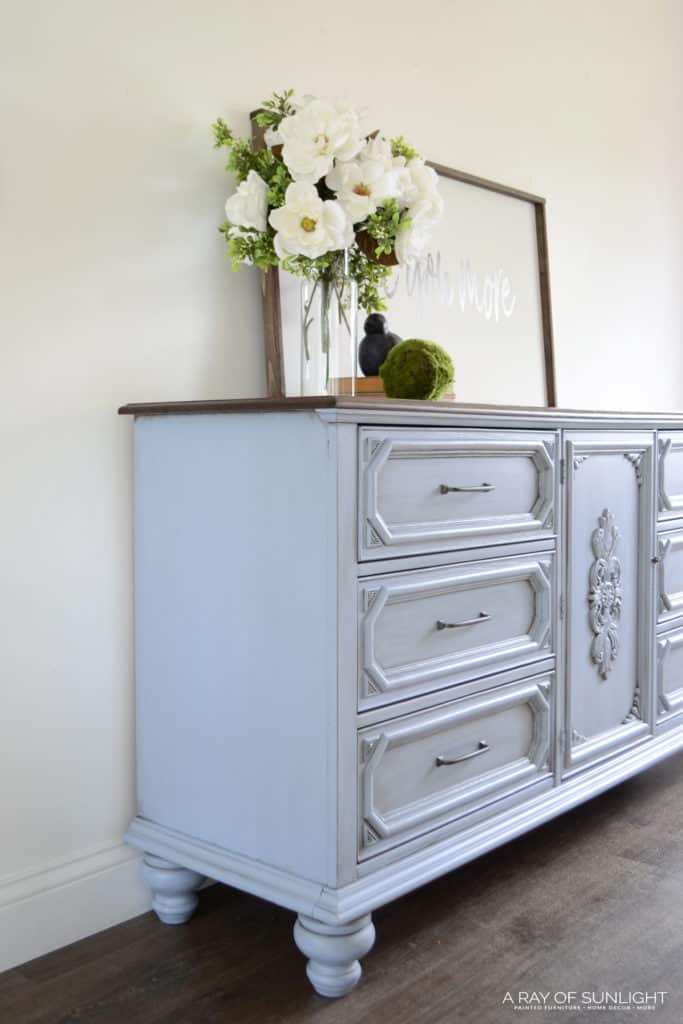
I'thou still blown abroad by how easy it was to add legs to a piece of furniture with the Dremel Multi-Max!
I really wish that I would take gotten this tool before because of all the things I have been able to do with it, other than the main reason I got information technology!
So if you don't have a multi-functional tool, run and become one!! You demand this tool in your toolbox too!
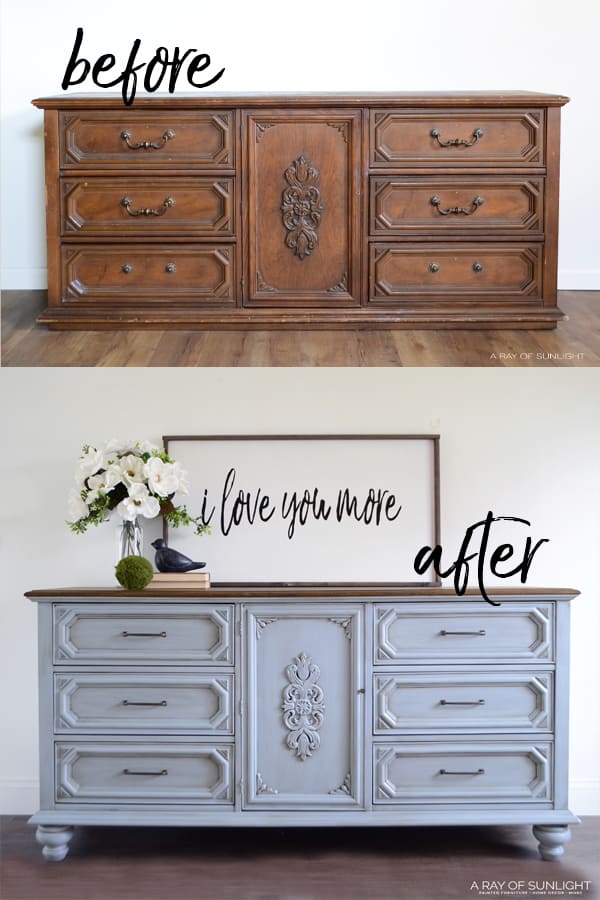
When all was said and done, nosotros added a little bit of extra height to the dresser, but we likewise got rid of the plain lesser as well. Double win!
Hither's a side past side before legs and after adding legs! Which manner do you like more?!
Active Fourth dimension one hr
Total Time 1 60 minutes
Difficulty Medium
Estimated Toll $50
Tools
- Dremel Multi Max
- Eye Protection
- Drill with a Small Drill Bit (smaller than the screws that come with the leg plates)
Notes
Some pieces of furniture may need to be slightly modified to be able to support new legs. About pieces of furniture that I have run into accept a corking base to brainstorm with one time the quondam legs are removed.
For more ideas on how you can add legs, check out this tutorial on adding legs to a cedar chest!
Source: https://arayofsunlight.com/easily-add-legs-to-furniture/
0 Response to "How To Put Legs On Ashley Sectional"
Post a Comment